Healthy Bone Broth

Healthy Homemade Bone Broth Recipe

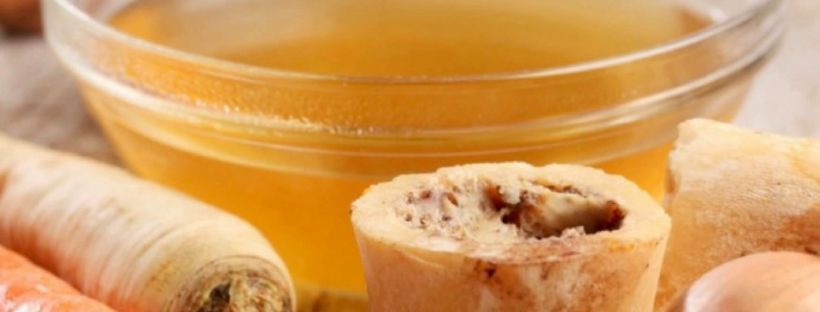
If you’re not making Bone Broth at home, I highly encourage you to try this simple and healthy Homemade Bone Broth Recipe.  Not only is it delicious, but it provides many benefits.  Bone Broth contains a high collagen content and is an excellent source of minerals.

When I first started learning about gut health, I was introduced to bone broth.  I was a little intimidated when I thought about making it but gave it a try anyways.  Since that day, it’s become a staple in my home and in my nutrition plan.  It stores well in the fridge (up to 7 days) and can freeze for up to 6 months.  Bone Broth is great to have in your freeze when an illness hits your home.

some of the many benefits of Bone Broth:

  1. Improves gut health and digestive issues
  2. Supports joint health
  3. Helps to overcome food intolerances and allergies
  4. Boosts detoxification
  5. Improves the appearance of healthy skin, hair and nails
  6. Supports brain and immune health
  7. Acts as a natural anti-anger
  8. Helps to improve sleep
  9. Reduces Inflammation
  10. Improves mood

where to find stock and broth bones:

  1. Your local butcher (pasture raised and grass fed, if possible)
  2. Your local farmers market (pasture raised and grass fed, if possible)
  3. Leftover from a meal you roasted


bone broth recipe (slow cooker)


ingredients:

2-4 lbs of bones (bison, beef, turkey or chicken carcass, etc)

4 stalks of organic celery, roughly chopped

4 organic carrots, roughly chopped

1 large organic onion, cut in half and quartered

4 cloves of garlic, peeled and chopped

2 Bay Leaves

Handful of fresh herbs (I like to add parsley)

4 Tablespoons Apple Cider Vinegar (helps draw in more of the goodies from the bones)

1 teaspoon whole peppercorns

Dash of salt (or more if desired)

Filtered water

*Optional: Chicken Feet

directions:

If you’re using bones with marrow (like bison or beef), roast your bones in a dish or on a baking sheet at 375 degrees for 45-60 minutes.  Turn your bones half way through the cooking time. Roasting these hearty bones is important!  This process delivers a beautiful color and TONS of flavor.

Place your bones of choice into your slow cooker.  I love to use the slow cooker, but you can also use a pot on your stove or an Insta Pot.

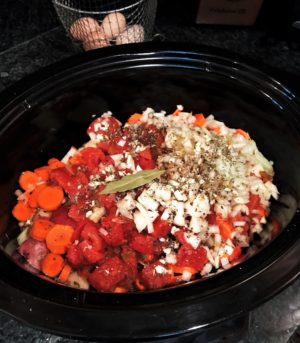
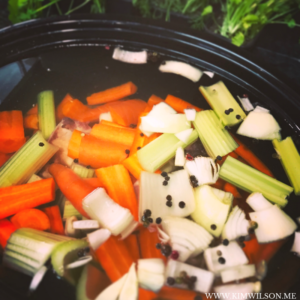
Add in your veggies, garlic, bay leaves, salt and pepper (if desired) and apple cider vinegar.  Fill your crock pot with filtered water, leaving about an inch or two of room at the top.  Some of the liquid will slowly cook down, so don’t worry about it boiling over.

Set your slow cooker to Low Heat and cook for 24-48 hours.  I like to cook mine for a long time. Not only does it enhance the flavor but the kitchen smells incredible too!  Don’t worry about overcooking.

During the last 30 minutes, add your fresh herbs.  Some people like to add the garlic here, but I like mine during the entire cooking process.  Discover what works for you and your taste buds.

Once the broth is done to your liking, turn off the heat and allow it to slightly cool.  Carefully remove and discard bones and any additional ingredients with a slotted spoon.

Using a colander, strain the rest of your broth into a bowl.  Scoop out any additional pieces that still may be present.

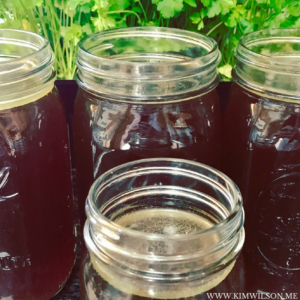
Ladle your broth into jars and refrigerate promptly.  I like to use Mason Jars when storing in the fridge.  If you’re freezing your broth, do so now.  Depending on how often you plan to enjoy it, you may want to freeze half of the batch and refrigerate the rest.  Personally, I keep it in the fridge because I enjoy it everyday.

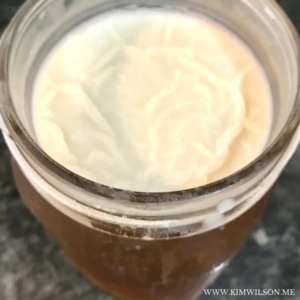
Note:  Once the broth has cooled, you will see the fat rise to the top.  This is a healthy fat.  If you do not desire to consume it, wait until the broth has chilled in the fridge.  It will form into a chilled layer and can easily be removed.

If you’re broth turns into a gel form, it’s a good thing. ?

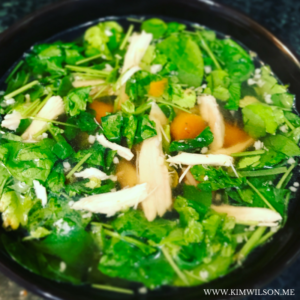
Bone broth is just as delicious when served alone as it is with other ingredients.  This broth makes an incredible soup.  Lately I’ve been a fan of bison broth but I enjoy many others.  The variety of color depends on how long you’ve cooked it and what kinds of bones you’re using.  I get my local bison bones from Gunpowder Bison & Trading Company


Have you made bone broth yourself?  What kind of bones do you enjoy the most?  I welcome your comment and feedback below.

XOXO,

Kim 


Lemon and Garlic Roasted Artichokes

Roasted artichokes are wonderful as a snack or side option to any meal.  They provide so much flavor and have a variety of health benefits. They are a rich source of fiber, vitamins and minerals.   Artichokes have a large antioxidant value and help prevent illness.  Their natural properties help to improve liver function and detoxification to remove toxins in the body.

Artichokes help soothe inflamed gallbladders and aid in digestive health.  They also provide bone health, increased brain function and reduce bad cholesterol while increasing good cholesterol.

With all of these benefits and more, roasted artichokes are a wonderful compliment to your plate.  Especially when prepared in a healthy way.

When I started thinking about cooking methods and recipes, I kept thinking about steamed or roasted artichokes that are doused in butter.  That’s a common method that’s prepared and enjoyed by many.

I knew I wanted to incorporate garlic and oil as an alternative to the butter.  I love lemon with garlic, so I decided to experiment and come up with a recipe that provides a lot of flavor. Not only did my house smell incredible while the artichokes were roasting, but the finished product left me adding this recipe to my “favorites list.”

I hope you enjoy this recipe as much as I do!

Roasted artichokes


Lemon and Garlic Roasted Artichokes

Serves: 2 Artichokes

ingredients

2 Artichokes (preferably organic)

8 Cloves of garlic (whole)

Fresh juice from 1 lemon

Zest from 1/2 of your lemon

2 Tbsp avocado oil (or oil of your choice)

1/2 tsp lemon pepper seasoning

Pinch of salt (optional)

 directions

Preheat your oven to 425 degrees.

Using a sharp knife, carefully cut the top third of the artichokes and the stem at the base.  With the base cut, the artichokes will sit well on your cutting board.  Using your knife, core out the center of the artichoke to make room for your garlic.  Using your fingers, pull and separate the leaves.  They will stick out a little on the sides.

Make two squares of foil to hold your artichokes for roasting.  In a small bowl, mix your oil, lemon juice, lemon zest and seasoning.  I don’t cook with salt, but if you want to add it in, do so now.

Take your garlic cloves and evenly distribute them into the core of your artichokes.  The number of garlic cloves you choose to use is completely up to you.  I love garlic (and the health benefits), so I go a little overboard when I cook with garlic.

Set your stuffed artichokes on their individual foil pieces.  Drizzle your oil combination evenly over both artichokes.  Once you’ve covered your artichokes and drizzled the oil evenly between the leaves and top, fold up and wrap your artichokes.  Placed your wrapped artichokes in a glass baking dish.

roasted artichokes

Roast artichokes in the oven for 50-65 minutes.  Once you’re done roasting, remove your dish from the oven and carefully unwrap your roasted artichokes.  Enjoy!


If you try this yummy recipe, i would love to hear your feedback.  I welcome any comments below.

XOXO,

KIM

Spicy Thai Chicken Lettuce Wraps

Every time I go to a restaurant and see Thai Chicken Lettuce Wraps on the menu, I want to order them.  At the same time, I wonder about all of the ingredients that are used.  Especially in the sauce.  A lot of ingredients are usually clean, but sauces can hide some “not so healthy” ingredients.

I love playing around with recipes in my kitchen.  That’s exactly what I was doing when I created this delicious combination of flavors.  I like heat in my meals (not too shabby for my metabolism either), so I kicked it up a bit with the Sriracha sauce.  You don’t have to add as much heat, but it’s rather tasty with a little kick.

Don’t be too overwhelmed with the amount of ingredients.  This meal is very fresh and usually comes together in 30 minutes or less.  If you want to enjoy leftovers the next day, double up your sauce and chicken portions.  They are just as tasty when eaten for leftovers.


Spicy Thai Chicken Lettuce Wraps

INGREDIENTS

Chicken Mixture:

1 pound ground chicken (or 4 boneless, skinless breasts, chopped)

Cooking oil (avocado, olive or coconut)

3 cloves fresh garlic, finely minced

Fresh ginger (1-inch knob, peeled and finely minced)

2 Scallions, diced (some can be reserved for garnish)

1/2 cup carrots, shredded

1/2 cup red cabbage, shredded

1 tbsp organic tamari sauce

1 to 1-1/2 tbsp Sriracha sauce (depending on preference for heat)

Pinch of crushed red pepper

Leaves, washed and dried (iceberg, butter or green cabbage)

Fresh cilantro, chopped (for garnish)

1 lime (cut into wedges)

NOTE: Instead of Tamari, you can use soy sauce or organic coconut aminos.

Peanut Sauce:

1/2 cup chicken broth (or warm water)

3 tbsp creamy peanut butter (clean option with no additives and hydrogenated oils)

1 tbsp raw honey

Fresh ginger (1/2 inch knob, peeled and minced)

2 cloves garlic, crushed

1 tbsp tamari (see note above for substitutions)

1/2 tbsp Sriracha sauce


DIRECTIONS

  1.  To make the peanut sauce, combine all ingredients listed (for the sauce) in a small saucepan.  Cook over medium-low heat, stirring occasionally.  The sauce will begin to thicken within. a couple of minutes.  Continue cooking until the sauce is at your desired thickness.  I usually cook mine for about 10 minutes.  Remove from heat and set aside.
  2. While your sauce is cooking, you can begin to make the meat mixture.  In a large skillet or wok, heat a little bit of oil.  Add your meat.
  3. As the meat begins to cook, using a wooden spoon, break apart your meat.  Add in the chili sauce, chili pepper, garlic, ginger and tamari sauce.  Cook until your meat is no longer pink.
  4. Add in the reminder of the ingredients.  Cook for a couple of minutes.
  5. Divide your leaves onto separate plates.
  6. Equally divide the meat mixture onto the leaves.
  7. Top with a drizzle of the peanut sauce and some chopped cilantro.  If so desired, you can top with diced scallions.
  8. Serve with a wedge of lime.

Last but not least, don’t forget to share with family and friends. ??


*Please don’t actually give it to your dog. ?

If you make this recipe, I would love to hear your thoughts.  Please comment below or message me with your feedback.  It’s become a favorite in our home.  I have no doubt it may become a favorite in yours as well.  Enjoy, friends!

XOXO,

Kim


Honey Balsamic Roasted Chicken and Vegetables

Are you tired of eating plain, boring chicken and vegetables?  Before I learned about healthy cooking, I thought clean eating and healthy living had to be boring.  Boy, was I wrong!  Now I make my healthy dishes with tons of flavor and love to keep things simple.  This honey balsamic roasted chicken and vegetable dish is one of my favorites.

It’s often a go-to dish that I make during the week when things are busy.  Not only is it  a recipe for a delicious and simple meal, but it’s also a great option for food prep.  I like to cook food in bulk once or twice a week to keep things simple.  Cooking in bulk (food prep) helps to maintain health goals, provides more time during the week and allows for less opportunity to make poor choices.

Honey Balsamic Roasted Chicken and Vegetables

ingredients:

6-8 boneless, skinless chicken breasts

12 asparagus (ends cut), cut in half

2 peppers (any colors), cut in strips

3 carrots, chopped or sliced

1/2 red onion, chopped (optional)

Black pepper (to taste)

Salt (optional and to taste)

3 cloves garlic, chopped

1 Tbsp Raw Honey

1/3 cup balsamic vinegar

1/2 tsp crushed red pepper (optional)

1/4 tsp paprika

1 Tbsp Italian seasoning mix (such as rosemary, oregano and sage)

4 Tbsp Cooking oil (I like to use avacado oil, but you can use olive oil)

Oil for baking sheets

NOTE~ You can use less honey if you’re cutting back on your sugar intake

directions:
  • Preheat oven to 425 degrees (Fahrenheit).
  • Season chicken with salt and pepper.
  • Combine your wet and dry ingredients in a bowl (without the veggies and meat).  Mix well.  Sometime I reserve a little of this mix to the side and brush it on the meat and veggies towards the end of the cooking process.
  • In a separate bowl, add your vegetables and 1/3 of the seasoning /oil mix.  Combine well.
  • In an additional bowl, combine the rest of your seasoning/oil mix with your chicken.
  • Line two baking sheets with foil (fold up sides to avoid the juices running).
  • Lightly oil your sheets.
  • Arrange all of your vegetables on one sheet and your chicken on another.  Avoid overlapping for thorough cooking.
  • Bake about 20-25 minutes.  The vegetables should be tender or cooked to your desired texture.  The chicken should be cooked through until no longer pink in the middle.

Note~  You can prepare the chicken ahead of time and marinate for a couple of hours in the fridge.  In addition, you can bake the veggies and chicken on one sheet (if it fits), but keep the two separated.  Glass baking dishes are another option; instead of using pans.

If you try this recipe, i would love to hear your feedback.  I welcome you to message below or email me. happy cooking!

XOXO~

Kim


Healthy and Hearty Slow Cooker Beef Stew

When the weather is cold and dreary, I crave good, hearty food.  That’s exactly what happened this past weekend when we had snow and ice.  I make a lot of stews, soups and chili recipes this time of the year, and I knew exactly what I wanted this past weekend.  A big bowl of my healthy and hearty slower cooker beef stew.

I love a good hearty meal when the weather is not so delightful.  I remember growing up as a child and having the most wonderful, warm and hearty meals at home.  Especially after a good snow storm and being out sledding all day.  My mother and grandmother taught me a lot about family and food.  That’s why I get all warm inside when I eat these kinds of dishes.

My family has a southern background, so I grew up around a lot of heavy and “not so great for me” foods.  That’s why I love taking different recipes and altering them. Not only do I feel better, but my digestive system thanks me for it.  You can still eat good, hearty food and eat well.

This recipe is perfect for the winter but can be enjoyed anytime throughout the year.  Not only is it filled with clean, farm to fork ingredients, but it’s easy to make.  I love my crock pot this time of year and use it often for meals.  Not only will your family love this recipe but your home will smell yummy too!

fullsizerender-64

Healthy and Hearty Slow Cooker Beef Stew

Ingredients:

2 pounds lean, grass fed chuck meat, cut into bite size pieces

1/3 cup stone ground white rice flour* (or your flour of choice)

1 (14.5 ounce) can of diced tomatoes, with juice (preferably organic and BPA free)

4-5 red potatoes, cut into large bite sized pieces

3 carrots, peeled and cut into bite sized pieces

2-3 cloves of fresh garlic, peeled and minced

1/2 cup chopped onion

1 Bay Leaf

1-1/2 cups low sodium beef broth (organic and homemade are better options)

1 Tbsp balsamic vinegar

3 tsp Worcestershire sauce

2 tsp black pepper

2 tsp paprika

2 tsp dried oregano

Olive Oil (for browning)

DIRECTIONS:

In a bowl, whisk flour and pepper together.  If using salt, add it in here as well.

Lightly coat all sides of the bite sized pieces of meat with your flour mixture.  Start to warm (medium heat) up a skillet on your stove top with a little olive oil.  Place portions of your flour coated meat in the skillet.  Allow them to cook for about 20-30 seconds per side.  You want to lightly brown the outside of the meat but not cook through.  Remove the cooked pieces and set to the side.  Continue until you have cooked all of your coated meat.

Add your cooked meat pieces to your slow cooker.  Add your prepared potatoes, carrots, onions, garlic, diced tomatoes (with juice) and Worcestershire sauce.

Combine your broth, balsamic vinegar, spices and them add in with your meat.  I like to place my bay leaf under some of the ingredients, but that’s just me. 🙂

Cover and cook your ingredients on high for 4-6 hours or low for 8-10 hours.  Stir well through the cooking process.  The ingredients will soak up a lot of the liquid and create a yummy, hearty texture.  Make sure they don’t get too dry and burn.  You can always add in a little more broth, but it’s been my experience that everything cooks well and comes together perfectly at the same time.

*NOTE:  Minus some of my condiments, I try to stick to a gluten free meal plan, so I use Bob’s Red Mill ground white rice flour for my dishes when flour is recommended.  You can use another kind of flour as well.  I’m not a huge fan of salt, so I omit it from most of my recipes.  Please add in and taste as desired.  Same with the spices. I am a huge fan of spices, so I tend to add a lot.  Please omit if you want to keep it simple.  I also LOVE garlic and onion (for the taste and health benefits), so if it’s too much for you, adjust the ingredient size.  It’s your dish, so add in (or take out) what you like. 🙂


I would love to hear your feedback after trying the recipe.  Please comment below or message me with any comments or questions.  I hope this hearty, healthy recipe is as much of a hit in your home as it is in mine.

Wishing you a warm, healthy holiday season!

XOXO~

Kim