Healthy Bone Broth

Healthy Homemade Bone Broth Recipe

If you’re not making Bone Broth at home, I highly encourage you to try this simple and healthy Homemade Bone Broth Recipe.  Not only is it delicious, but it provides many benefits.  Bone Broth contains a high collagen content and is an excellent source of minerals.

When I first started learning about gut health, I was introduced to bone broth.  I was a little intimidated when I thought about making it but gave it a try anyways.  Since that day, it’s become a staple in my home and in my nutrition plan.  It stores well in the fridge (up to 7 days) and can freeze for up to 6 months.  Bone Broth is great to have in your freeze when an illness hits your home.
some of the many benefits of Bone Broth:

  1. Improves gut health and digestive issues
  2. Supports joint health
  3. Helps to overcome food intolerances and allergies
  4. Boosts detoxification
  5. Improves the appearance of healthy skin, hair and nails
  6. Supports brain and immune health
  7. Acts as a natural anti-anger
  8. Helps to improve sleep
  9. Reduces Inflammation
  10. Improves mood

where to find stock and broth bones:

  1. Your local butcher (pasture raised and grass fed, if possible)
  2. Your local farmers market (pasture raised and grass fed, if possible)
  3. Leftover from a meal you roasted


bone broth recipe (slow cooker)


ingredients:

2-4 lbs of bones (bison, beef, turkey or chicken carcass, etc)

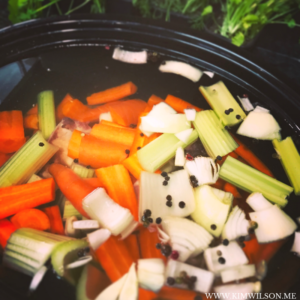
4 stalks of organic celery, roughly chopped

4 organic carrots, roughly chopped

1 large organic onion, cut in half and quartered

4 cloves of garlic, peeled and chopped

2 Bay Leaves

Handful of fresh herbs (I like to add parsley)

4 Tablespoons Apple Cider Vinegar (helps draw in more of the goodies from the bones)

1 teaspoon whole peppercorns

Dash of salt (or more if desired)

Filtered water

*Optional: Chicken Feet

directions:

If you’re using bones with marrow (like bison or beef), roast your bones in a dish or on a baking sheet at 375 degrees for 45-60 minutes.  Turn your bones half way through the cooking time. Roasting these hearty bones is important!  This process delivers a beautiful color and TONS of flavor.

Place your bones of choice into your slow cooker.  I love to use the slow cooker, but you can also use a pot on your stove or an Insta Pot.

Add in your veggies, garlic, bay leaves, salt and pepper (if desired) and apple cider vinegar.  Fill your crock pot with filtered water, leaving about an inch or two of room at the top.  Some of the liquid will slowly cook down, so don’t worry about it boiling over.

Set your slow cooker to Low Heat and cook for 24-48 hours.  I like to cook mine for a long time. Not only does it enhance the flavor but the kitchen smells incredible too!  Don’t worry about overcooking.

During the last 30 minutes, add your fresh herbs.  Some people like to add the garlic here, but I like mine during the entire cooking process.  Discover what works for you and your taste buds.

Once the broth is done to your liking, turn off the heat and allow it to slightly cool.  Carefully remove and discard bones and any additional ingredients with a slotted spoon.

Using a colander, strain the rest of your broth into a bowl.  Scoop out any additional pieces that still may be present.

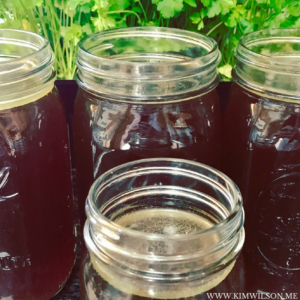
Ladle your broth into jars and refrigerate promptly.  I like to use Mason Jars when storing in the fridge.  If you’re freezing your broth, do so now.  Depending on how often you plan to enjoy it, you may want to freeze half of the batch and refrigerate the rest.  Personally, I keep it in the fridge because I enjoy it everyday.

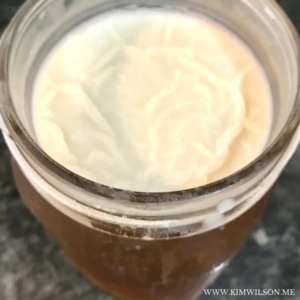
Note:  Once the broth has cooled, you will see the fat rise to the top.  This is a healthy fat.  If you do not desire to consume it, wait until the broth has chilled in the fridge.  It will form into a chilled layer and can easily be removed.

If you’re broth turns into a gel form, it’s a good thing. ?
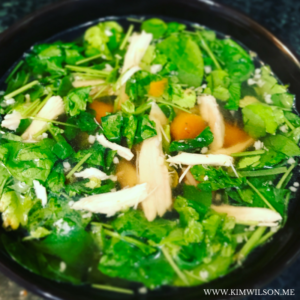
Bone broth is just as delicious when served alone as it is with other ingredients.  This broth makes an incredible soup.  Lately I’ve been a fan of bison broth but I enjoy many others.  The variety of color depends on how long you’ve cooked it and what kinds of bones you’re using.  I get my local bison bones from Gunpowder Bison & Trading Company
 

Have you made bone broth yourself?  What kind of bones do you enjoy the most?  I welcome your comment and feedback below.

XOXO,

Kim 
 

Negative people

How to Detox Negative People From Your Life

Negative people weigh us down and keep us from achieving greatness, better health and much happiness.

Have you ever felt overwhelmed because of the negativity or negative people that surround you?

In this world, there are negative people that are hard to avoid. These people drain your soul, and leave you feeling like they are constantly sucking the life out of you. I call these people Qi suckers because they can suck you dry and deplete your vital life force, otherwise known as Qi.

I WANT TO ASK YOU A FEW QUESTIONS…

  • Are you feeling supported by the people in your life?
  • Do the people in your life add value to your existence?
  • Looking at the people in your life, do you feel they love you unconditionally?
  • Are you accepted for who you are?

If you answered no to any of the above, then you may be surrounded by toxic or negative people.

There are many things in life that are toxic, including food and chemicals; however, there are also negative people who are just as toxic. You must be clear on who lifts you up and who hurts you. Toxic people significantly impede our happiness and contribute to our high-stress levels.  This leads to digestive issues, poor sleep, headaches and weight gain.

If you know you have negative people in your life, it may be best for your health to set clear boundaries for them so you can continue to thrive.

HERE’S HOW TO DO IT:

1. Take 5-15 minutes to write down three boundaries you want to set in your life.

2. Now, think of 5 people who are crossing them. There may be more, but I want to be realistic about what we can accomplish during this exercise.

3. How will you know when these boundaries are crossed?  Often, you’ll feel uncomfortable when boundaries are broken, and you get that “gut feeling” that a particular person is not good for you.

4. When these boundaries are crossed, how will you handle it? You deserve to be happy and fulfilled from the people in your life.  If there are people who are not contributing to your happiness, it may be time to let them go or lovingly detach. You do not need to remove this person entirely from your life, but you need to create a healthy distance.

For example, if you want to say no to a party, event or lunch where you know this person will be, you have to make a strong decision to put yourself first. Can you hold onto your sacred space if you attend or do you need to say no? Saying no to something that does not serve you may bring up feelings of guilt, but the more you say yes to your existence and happiness, the more freedom you’ll have when you say NO.  In addiiton, the greater quality of life you’ll experience.

5.  Bring in the Positivity!  Bring in people and relationships who lift you up, encourage you and show positive support.  When you have dreams, plans and goals, these are the people who encourage you to live that kick ass life that you deserve!

“Detachment means to remove one’s mind from all sorts of desires. As the mind is removed from desires, the energy that was being destroyed in running after these desires is saved, and it becomes a flame.”  -Osho Quotes

If you’ve started your own healthy detox or plan to soon, please share below.  Comments and feedback are always welcome.  ?

XOXO~

Kim

detox baths

Boost Your Immune System with Detox Baths

Detox baths are a great way to cleanse the body, eliminate toxins and boost the immune system.

This time of the year, so many people are getting sick and feeling run down.  Yes, the dreary and cold days can contribute to our mood and health, but so do the toxins that we’re holding onto and the ones that we are constantly exposed to.

Our lives are crazy busy, and most of us rush through the day without a thought to alleviating all the damage that is being done to our bodies: By what we eat, the air we breathe, and the stress inflicted upon us.

A detox bath can sweat out those toxins and alleviate their harmful impact. They will boost your immune system too!


The process for a detox bath is really quite simple. Detoxers immerse themselves in a tub filled with very hot water and essential ingredients, some active and some soothing. As you soak, the toxins are pulled to the surface of the skin and then washed away.

The key to a successful detox bath is preparation.  It is very important to properly hydrate before
you begin. The day before you plan to detox, increase your fluid intake (water) and avoid dehydrating ingredients, such as caffeine and alcohol. This will ensure that no damage occurs to your body as the impurities are drained from your body.

Detox baths require very hot water. As hot as your body can tolerate, but please don’t burn yourself.  Warm water or reasonably hot water will just not work. It is essential that the body sweats during the detox process, and that won’t happen if the water is too cool.

To actively draw out toxins, detox baths should to contain at least one strong, active ingredient and several soothing ones. For example, harsh ingredients such as apple cider vinegar or hydrogen peroxide might be offset by essential oils. The ingredients you choose will determine the benefits to your body. Many recipes are available on the Internet. One of my favorites is listed below.

Most recipes call for a soaking of more than 20 minutes. You need to give those impurities time to float to the surface!  I recommend a bath time of 40-60 minutes.  The first 20 minutes gives your body time to remove toxins.  The remaining 20 to 40 minutes allows time for your body to absorb the minerals in the water.

When you have completed the recommended stay in the water, gently wipe off your skin and drink water. Give your body time to recover from the strain of detoxification. That will enhance the benefits and enhance your well-being.  Completing a detox bath will help you feel rejuvenated and healthy.


MY FAVORITE DETOX BATH:

ingredients
1 Cup Epsom Salt
1 Cup Baking Soda
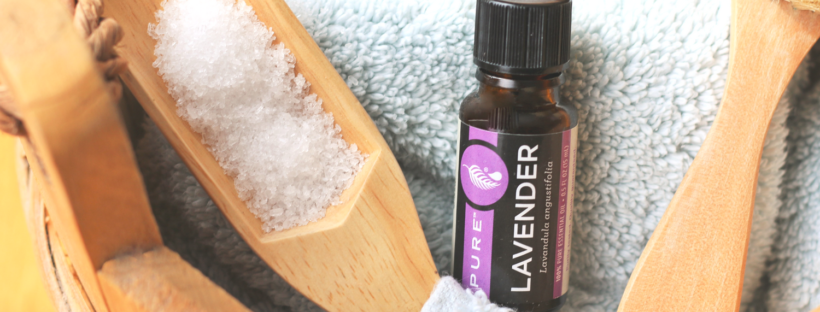
10 Drops of Lavender Essential Oil
 *Note:  I also like to use Bentonite Clay (in place of the baking soda).
directions
  1.  Pour your ingredients into hot bath water.
  2. Soak your body for at least 20 minutes (as much as you can, up to your neck).
  3. Once you are done with your bath and have dried off, avoid eating for at least 20 minutes.
  4. Drinks lots of water.

Note:  Skin brushing before taking a bath or shower is very beneficial.  Especially before a detox bath.  If you’re pregnant or have any health concerns, please consult your doctor before performing a detox bath.

WHILE IT MAY BE TEMPTING TO QUICKLY DIP INTO A HOT TUB AND DRY OFF, THE LENGTH OF TIME SPENT IN THE TUB WILL DETERMINE THE SUCCESS OF YOUR DETOX.

If you have any questions about detoxing or a detox bath,  please comment below.  You’re welcome to message me as well.  I enjoy detox baths all year, but they are especially beneficial during the harder, winter months.

Wishing you much health and happiness!

XOXO,

Kim

Lemon and Garlic Roasted Artichokes

Roasted artichokes are wonderful as a snack or side option to any meal.  They provide so much flavor and have a variety of health benefits. They are a rich source of fiber, vitamins and minerals.   Artichokes have a large antioxidant value and help prevent illness.  Their natural properties help to improve liver function and detoxification to remove toxins in the body.

Artichokes help soothe inflamed gallbladders and aid in digestive health.  They also provide bone health, increased brain function and reduce bad cholesterol while increasing good cholesterol.

With all of these benefits and more, roasted artichokes are a wonderful compliment to your plate.  Especially when prepared in a healthy way.

When I started thinking about cooking methods and recipes, I kept thinking about steamed or roasted artichokes that are doused in butter.  That’s a common method that’s prepared and enjoyed by many.

I knew I wanted to incorporate garlic and oil as an alternative to the butter.  I love lemon with garlic, so I decided to experiment and come up with a recipe that provides a lot of flavor. Not only did my house smell incredible while the artichokes were roasting, but the finished product left me adding this recipe to my “favorites list.”

I hope you enjoy this recipe as much as I do!

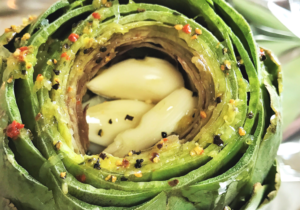
Roasted artichokes


Lemon and Garlic Roasted Artichokes

Serves: 2 Artichokes

ingredients

2 Artichokes (preferably organic)

8 Cloves of garlic (whole)

Fresh juice from 1 lemon

Zest from 1/2 of your lemon

2 Tbsp avocado oil (or oil of your choice)

1/2 tsp lemon pepper seasoning

Pinch of salt (optional)

 directions

Preheat your oven to 425 degrees.

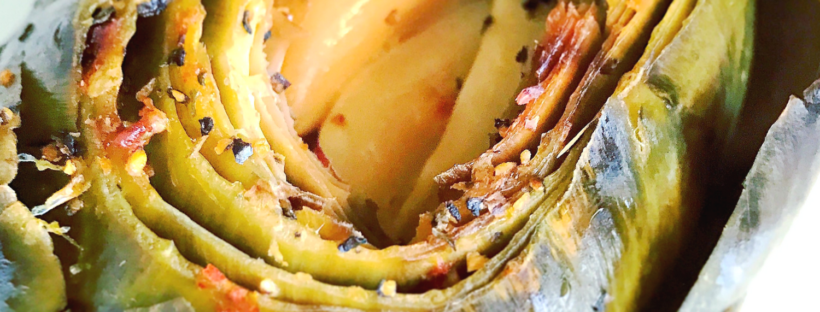
Using a sharp knife, carefully cut the top third of the artichokes and the stem at the base.  With the base cut, the artichokes will sit well on your cutting board.  Using your knife, core out the center of the artichoke to make room for your garlic.  Using your fingers, pull and separate the leaves.  They will stick out a little on the sides.

Make two squares of foil to hold your artichokes for roasting.  In a small bowl, mix your oil, lemon juice, lemon zest and seasoning.  I don’t cook with salt, but if you want to add it in, do so now.

Take your garlic cloves and evenly distribute them into the core of your artichokes.  The number of garlic cloves you choose to use is completely up to you.  I love garlic (and the health benefits), so I go a little overboard when I cook with garlic.

Set your stuffed artichokes on their individual foil pieces.  Drizzle your oil combination evenly over both artichokes.  Once you’ve covered your artichokes and drizzled the oil evenly between the leaves and top, fold up and wrap your artichokes.  Placed your wrapped artichokes in a glass baking dish.

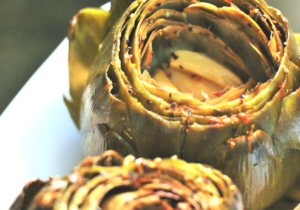
roasted artichokes

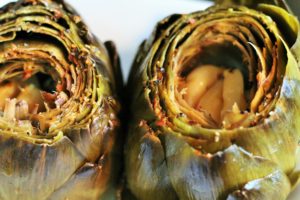
Roast artichokes in the oven for 50-65 minutes.  Once you’re done roasting, remove your dish from the oven and carefully unwrap your roasted artichokes.  Enjoy!


If you try this yummy recipe, i would love to hear your feedback.  I welcome any comments below.

XOXO,

KIM

chocolate

Dark Chocolate Coconut and Cranberry Bark

When you think of Valentine’s Day, what’s the first thought to come to mind?  Are you thinking about romance?  Maybe it’s a gorgeous bouquet a roses.  Many times, I think of chocolates.  I am not much of a “sweet’s person” but I do enjoy some dark chocolate from time to time.  That’s one of the reasons why I love this Dark Chocolate Coconut and Cranberry Bark recipe.

Not only is it delicious, but it’s guilt free, easy to make and stores well.  One batch makes plenty to share too!  want more, double up the recipe. ?❤️

Instead of over indulging with a box of chocolates and hitting a sugar crash, try this cleaner and healthier option.  You may find yourself keeping these staples in your pantry.  I find myself making this recipe more than once a year.  In fact, I add peppermint to it during the holidays.  It makes for a yummy and festive treat or gift.

This recipe is very flexible, so add ingredients that you like.  If you want some peppermint, throw in some peppermint extract.  If you want more crunch, chop up some raw nuts and add them into the melted chocolate mixture.


dark chocolate coconut and cranberry BARK

INGREDIENTS:

1- 1/2  cups dark chocolate chips (I used extra dark and organic)

4 Tbsp organic coconut milk

1- 1/2 cups organic coconut oil (melted)

Handful of  shredded organic coconut (unsweetened)

Handful of dried organic berries (of your choice), chopped

*Optional: A pinch of Himalayan or Sea Salt

*Note:  Raw nuts (chopped) would be yummy in this recipe too!  If you decide to add peppermint, add 1 teaspoon peppermint extract to the melted chocolate.

DIRECTIONS:

Prepare an 8×8 inch glass baking dish with parchment paper.  The paper should cover the bottom of the pan and all four sides.

On your stove top, heat the chocolate in a double boiler (or sauce pan over a pot of simmering water).  Continue stirring while the chocolate melts.  Add in the coconut milk.  Stir until you have a thinner and creamy chocolate texture.  If you choose to add peppermint, salt or nuts, add it in now.

Spread the melted chocolate evenly across the bottom of the pan.  Freeze your chocolate until it sets.  I’ve discovered the freezer is a better (and less time consuming) option than the refrigerator.

When your chocolate is ready to come out of the freezer, start to melt your coconut oil in a clean dish.  Once heated, coconut oil turns into a liquid texture rather quickly.  If your oil still has some lumps in it, continue stirring until all of the lumps are gone.

Pour the melted coconut oil over your chilled chocolate.  It will spread very easily.  Sprinkle the shredded coconut and chopped berries over the melted oil.  Chill in the freezer or fridge until the oil sets.  It will have a pretty white top once it’s done.

Once both layers have chilled and set, remove them from the fridge or freezer.  You can add more coconut and berries, if you choose.  I like to do it while the oil is still warm because it molds the toppings into the bark.

Remove the bark from the pan and peel off the parchment paper.  Place your prepared bark on a cutting board and chop into pieces.  Serve and enjoy!

Note:  If you want to store your bark, I recommend storing it in the fridge or freezer.  Room temperature may melt the bark and make it softer.  You can also use coconut butter instead of coconut oil.  Coconut butter is usually found in health food stores.  You can also make your own.  To do so, blend an entire package of unsweetened shredded coconut in your food processor or high speed blender.  The flakes turn into a creamy, buttery texture.  Both options are delicious, so choose whichever one you prefer.

I would love to hear your thoughts about this sweet treat!  If you have any suggestion about other ingredients that you like, I welcome you to comment below.

Happy Valentine’s Day, Beauties! 


XOXO,

Kim